Showing posts with label studio spaces. Show all posts

Monday, April 8, 2013

monet.

why hello. my name is Dawnelle. i am considered many things, mother and wife are at the top of the list. but you must not forget lover of sharpies, chief nose wiper, avid obsessor of texture and fabric, bohemian lover, interior designer, laundress, and the best book reader ever. i write over on Just Dawnelle about my sweet family and my life... what i think, feel, love, believe, do and obsess over. 

Oh this room... I think I am going to dream about this marvelous space tonight. The room is inspired by Claude Monet's The Boat Studio on the Seine, a bright impressionist painting full of color and light. It was the perfect piece to create a classy and sophisticated space with a slight ethnic bohemian touch.

My goal for the space was to create a fresh sophisticated feminine feel reminiscent of the beautiful flowers found in nature. The muted colors and black accents help to subdue the bright and youthful colors in the painting allowing for a sophisticated and classy interior to be created. The fun touches of texture found in the throw pillows and shell chandelier along with the ethnic curtains help to add a layer of free spirited bohemian style perfect for a young girl's room.

I would love to see this room with the artwork filling an entire wall, HUGE, like as big as it can get... 56"x 42". Add a few accents of those gorgeous paint colors and some white furniture. Oh the possibilities... What do you think? Where would you like to see this inspiration used? a living room... office... bedroom?

Thursday, March 7, 2013

Pollock inspiration.


Jackson Pollock... one of the first artists I remember learning about as a kid. How fun is his artwork? How freeing and bright and perfect for a child's room??

The goal for this space is to create a bright, airy, fun, freeing space that allows a child to be themselves. Through the use of white furnishings and bright colors, an energetic space will be created. The organic and detailed Pollack will be balanced by the simplicity of the rug, blanket, and simple colors. Add in a little bohemian flair with the minimal dream catcher and a wonderful, youthful, bright space will be created.

The best part though of this fabulous room? The amazing Space Kid print from Couple Jones we saw earlier this week right here. The digital download is available for a fabulous price with ALL proceeds being donated to Compassion International. How amazing is that?! Couple Jones has started doing an incredible thing here... be sure to check out more information about their initiative HERE and you can purchase the print HERE.

Monday, February 11, 2013

pom poms.

BabyPom
Hi! My name is Emily. My husband, Zac, and I started CoupleJones.com. We are so excited to visit A Little Artsy today! We have been married for almost 10 years and have 3 crazy little girls. We both love design and art - he is a designer and I am a stay at home mom who loves photography, sewing, and random crafts that I get a bee in my bonnet about trying.
I like to do all kinds of different projects but I don't usually have the money or time to go out and buy a new tool or fancy craft accessory to try it with. So let me preface this post by saying this is the SLACKER'S method of making Pom Poms, no fancy tools, poms don't always turn out perfectly...BUT it also is a wonderful way to involve your kids in a craft because all you use is your fingers and yarn. There are some awesome tools out there to make Pom Poms and to make them perfect every time. But sometimes you just need to make a Pom, like right now, so this is what we do.
You need yarn and scissors. That's it.
IMG_8216
Recently, I have been loving little Pom Poms so I enlisted my middle girl to help me with her little tiny hands.
LIttleThings4
Next, just follow these steps:
Couplejonesprojects11
Wrap yarn as thick as you can around the ends of your fingers. Slide the looped yarn off the end of your fingers and tie a length of yarn around the loop as tightly as you can...you might need those little fingers to help again. Cut trough the looped ends of the yarn. Shake and fluff.
I tied these brightly colored Poms to a ribbon and made a garland for our dining room.
PomPoms2
We also made a cream colored garland that I have hanging in our hallway and that I have used for some recent photo shoots.
PomPoms3
Happy Pom making!

Sunday, February 3, 2013

go, go , go!

 
Contributed by Danielle Roy. Christ follower.  Married to my best friend. Mother to three. Photographer. Vintage. Homeschool.  Likes simple.  Enjoys the little things.  From the South.  Blogs at PONY+MAUDE. Instagram @PONYMAUDE.

You have probably visited a children's museum. But, have you attempted to introduce your children to a more mature museum experience?  The thought alone may be intimidating. Here are a few tips to help shake those fears, and prepare you and your child for a wonderful trip to the museum.
1. Ahead of time. Be sure that all those tummies are full and potty breaks have been had. Most museums won't allow drinks or snacks. Planning your trip after a morning car snack would perhaps work best.
2. Prep. Just before you arrive, prepare their minds for what's ahead.  Pose the rules in the form of questions. Where are we going? What voices do we use? Do we touch? 
3. Plan. Have you and your spouse or a friend visited before. If so, maybe you know your route? Small children will probably not be able to observe everything. These days most museums have an online directory, or consult one when you first arrive on sight. 
4. Participate. If the child is of age, have them take a notebook to jot their thoughts. Or draw their version of what they see. Lots of children love to journal and doodle like this. If it's a wee one you have with you, play on their interests. "Look mommy at the circus (in the painting)!" Yes it is! Do you see the clowns? What color are the elephants? 
5. Know when to fold. Most children are only going to manage up to a 30 minute visit. Even less for younger guys. It doesn't seem like much time when you consider the prep, but know that you are instilling a life time love for the museum and arts with each minute your there.

Tuesday, January 29, 2013

mood board.

why hello. my name is Dawnelle. i am considered many things, mother and wife are at the top of the list. but you must not forget lover of sharpies, chief nose wiper, avid obsessor of texture and fabric, bohemian lover, interior designer, laundress, and the best book reader ever. i write over on Just Dawnelle about my sweet family and my life... what i think, feel, love, believe, do and obsess over. 
As the second edition of the artist inspired mood boards I present to you...

print // curtains // mobile // blanket // night stand // floor light // ottoman // rug // tapestry

I chose Night Watch for the masculine yet classic and timeless feel found in this Baroque painting. I felt that it told a wonderful, almost whimsical, imaginative story for a young boy to grow up with.

My goal is to capture a feeling of honor, royalty, and yet modern simplicity. By selecting finishes with both simple lines and colors the focus is able to stay on the painting. The geometric shapes and mix of textures found in the rug, ottoman, and mobile, contrasting the ornate detail in the toned down Persian style rug and painting create a wonderful contrast.

I think I might be a little in love with this room. I can see it in my head already... bright white walls... a nice collage wall full of a mix of different frames like found here. This boy is going to grow up with a serious sense of style and appreciation for the arts, I can just tell! Can't you??

PS... If you have any pieces of artwork you would love to see featured, don't hesitate! I'd love to hear your ideas!!!

Thursday, January 24, 2013

office artwork.

Hi ya, I'm Kelly. Mom to buddy roo + two, designer, creative director & blogger at Westover Manor. Where I share my style, show off my little ones and talk a bit about life and design.

Just before the Hubs and I started dating, literally just before. I had the amazing opportunity to go on a 15 day transatlantic cruise with my sister. We started in Florida and stopped in England, France, Norway, The Netherlands and finally Denmark. 
The night before I was to leave on my trip the yet-to-be-Hubs and I had our second date, and things were going well. So well in fact that I was sure he was going to send me off with our first kiss. Of course he didn't because he chickened out! But we sorted all that out when I got back and spent a whirlwind-ish year and half dating, engaging and then getting married like the crazy love birds we are.

I've had photos and collages of this trip all over our house since we were first married and I don't think I'll ever get rid of them. They've since moved around and have been pushed aside to make way for family photos, baby photos and silly life photos. Currently the Oslo Collage I created is situated on my desk. So I thought I would doodle a little something viking inspired to accompany it...


I now feel like my work station is more than just a computer desk. Now it's a space to create and be inspired.
I had an art teacher tell me once to never create from your mind. Meaning, never create from nothing. Instead find a piece of inspiration and work from there. The finished product will always be more refined and complete when you have a solid starting point and vision to work toward.


xoxo


Monday, January 21, 2013

big girl bed.

Hi! My name is Emily. My husband, Zac, and I started CoupleJones.com. We are so excited to visit A Little Artsy today! We have been married for almost 10 years and have 3 crazy little girls. We both love design and art and garage sales - he is a designer and I am a stay at home mom who loves photography, sewing, and random crafts that I get a bee in my bonnet about trying IMG_6259
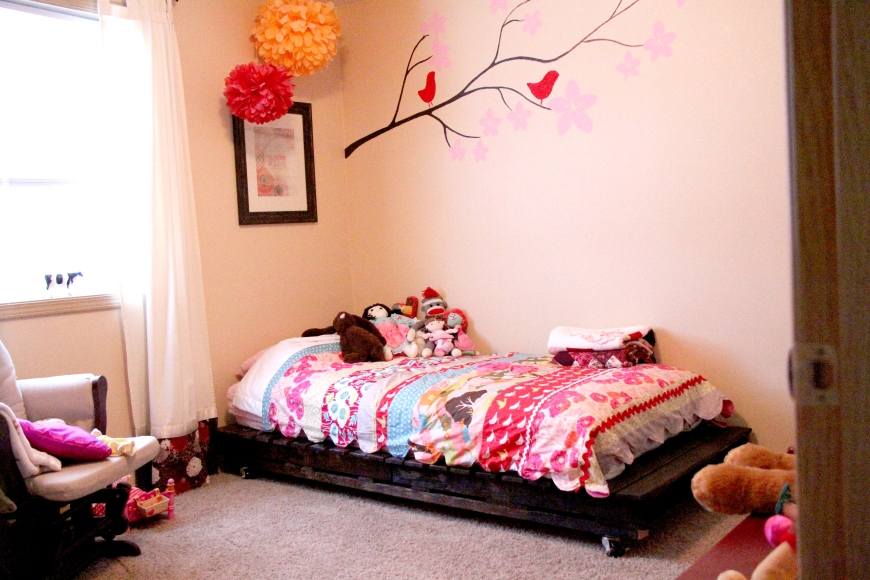
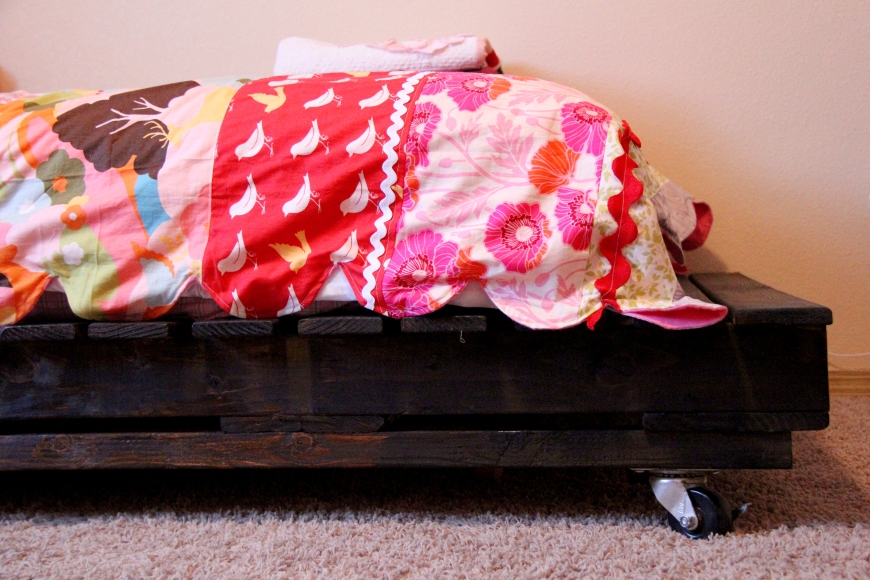
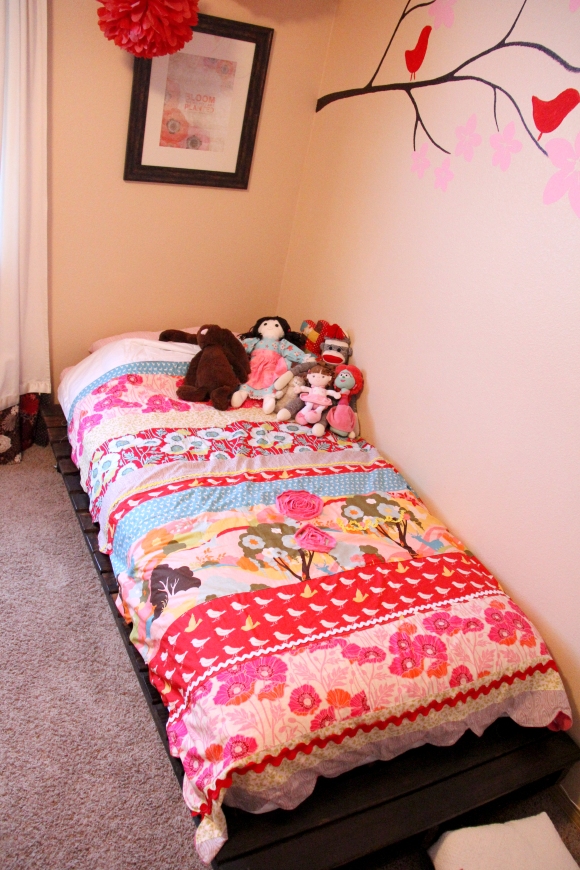
Our middle daughter just graduated to her big girl bed. She's sleeping in it tonight for the first time and so far we haven't heard a peep so I think she likes it! After looking around at cheap twin bed frames that were either boring or particle board or both, we decided to make our own out of wood pallets. I've seen a lot of projects like this floating around the internet but the one that inspired me the most was the pallet bed that Ashley from Under the Sycamore made a few years ago. It's beautiful!!
So the first task to tackle for us was to FIND pallets. I really hoped we could find some pallets made with bare wood that hadn't been treated with any chemicals. We also wanted sturdy pallets that hadn't been beaten up by whatever they had been created to carry. So we went on a hunt to Home Depot. I love Home Depot. But this was not something that our local Home Depot guys had ever heard of. We got several looks of disbelief and had to talk to several different associates before we were able to communicate that yes, we did want to buy a pallet. Yes, we know what a pallet is. No, we don't want to rent it...we want to own it...for, like, forever. Apparently, it's not standard procedure to sell pallets at Home Depot. So make sure you talk to your friendly sales associates before you head out on your search. I think they sold them to us just because they were tired of talking to us about them. We got each pallet for $15. You never know if you don't ask, right? ;)
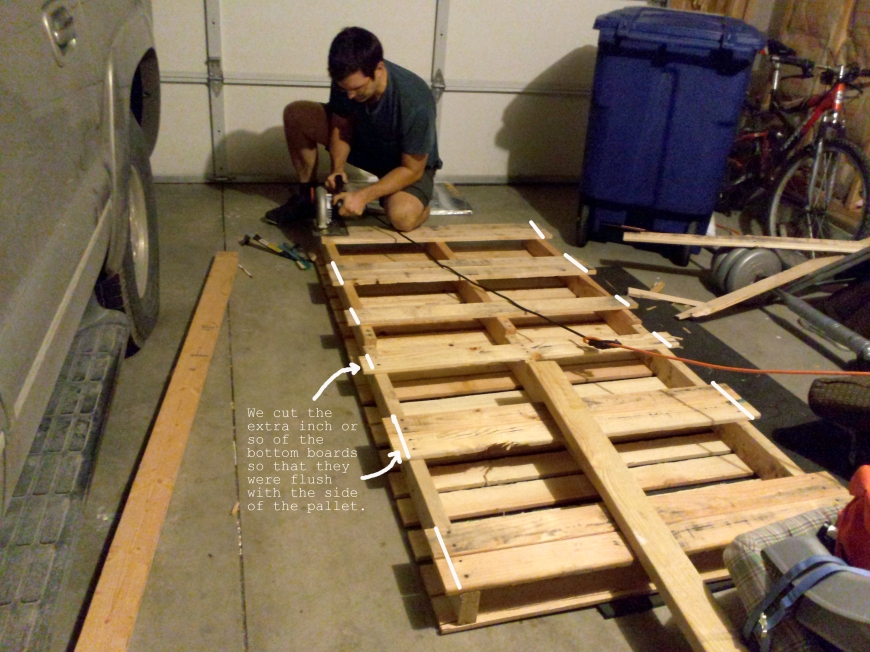
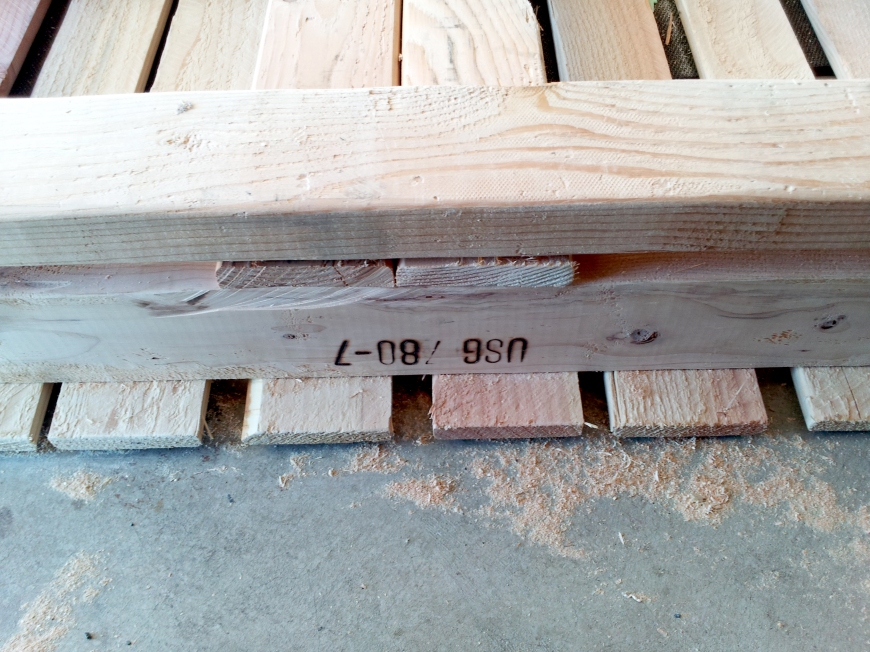
We brought them home and laid them side by side. We decided to cut the extra lengths of the support boards off on what would be the bottom of the bed so that they were flush with the studs.
2012-12-04 20.04
2012-12-05 11.17.01
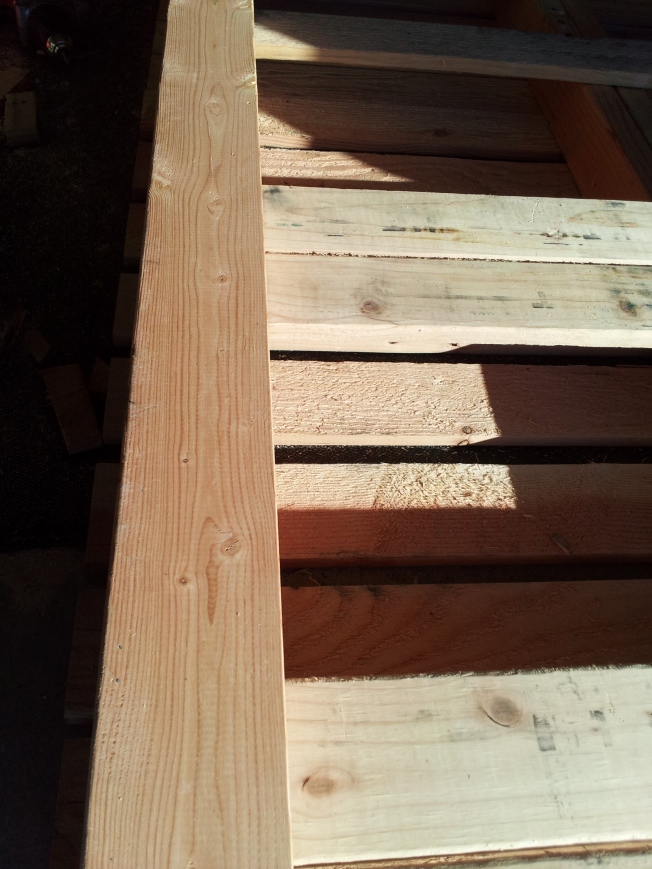
Then we attached our studs. We used 2x4s. One attached to each side of the pallets so that there were two studs extending the length of the bed. We also put one down the center so that the bed is really solid - we're assuming that at some point our toddler will jump on her bed. :)
2012-12-05 11.16.48
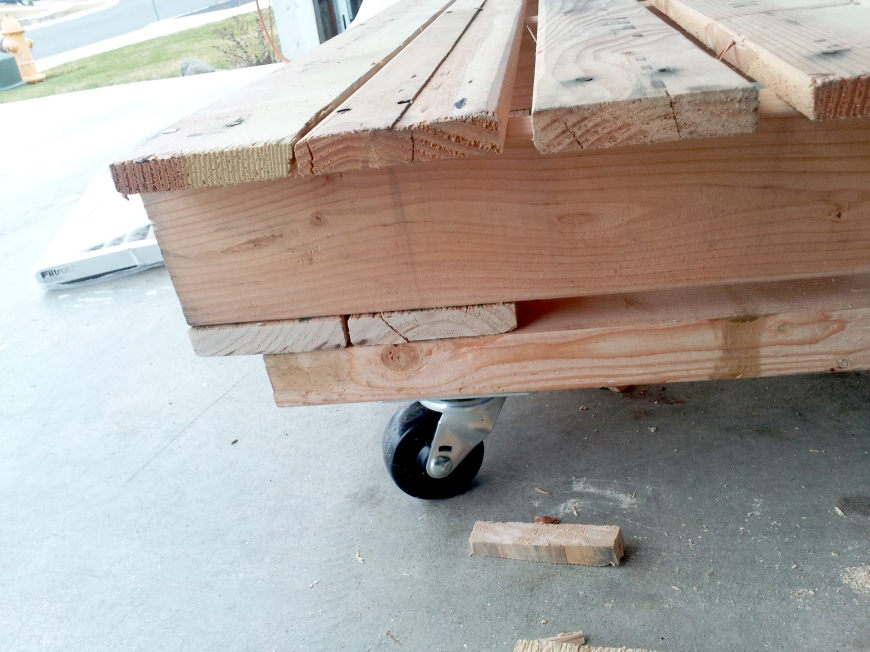
After the studs were on, we were able to flip the bed upright. We looked at several different options to use for legs on the bed but I really liked the unique look that Ashley's bed had with the wheels she used. We were REALLY glad we used the wheels this afternoon when we moved this sucker from the garage to the house. It's a sturdy, heavy thing and it was pretty awesome to be able to roll it halfway there!
2012-12-06 14.37.49
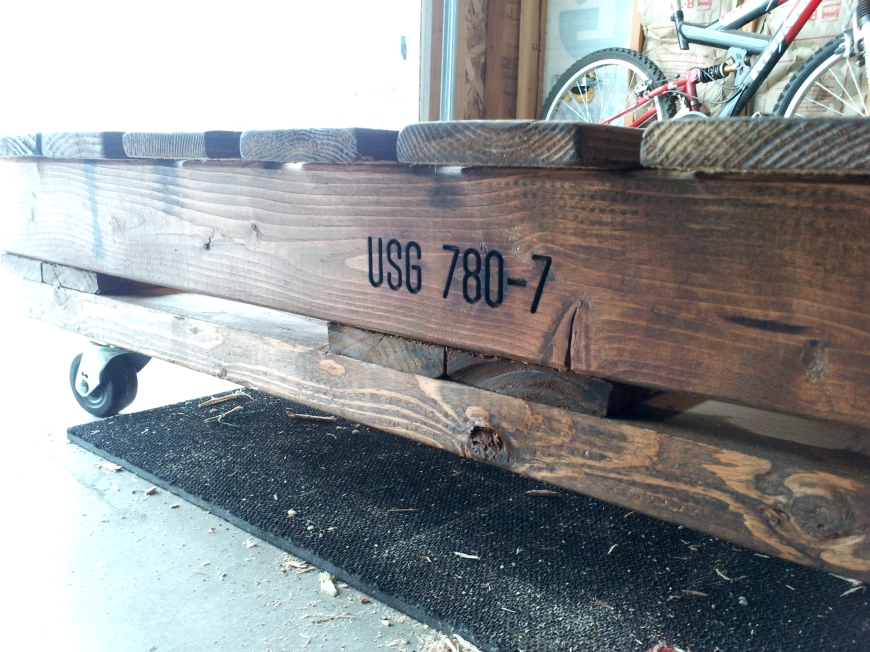
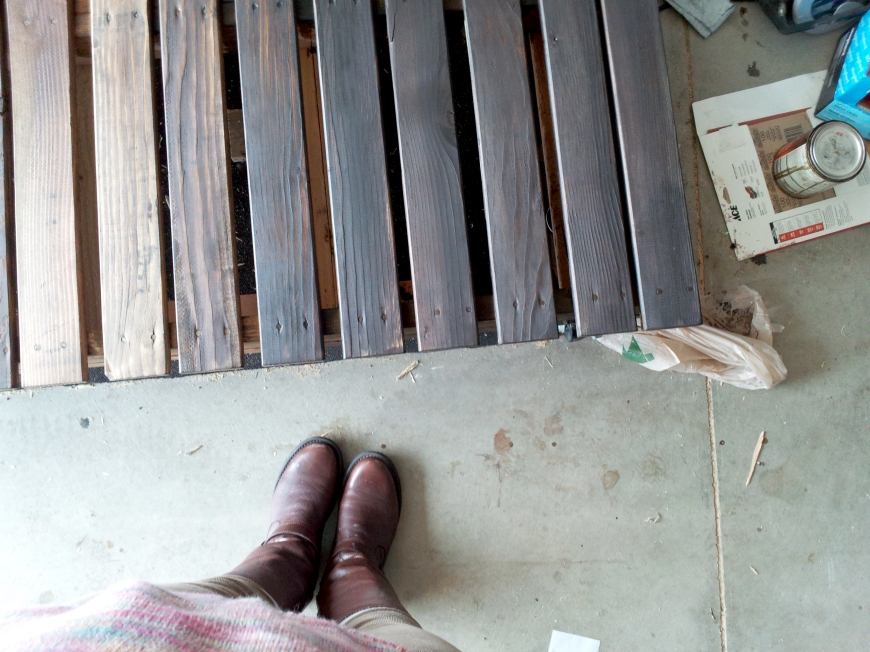
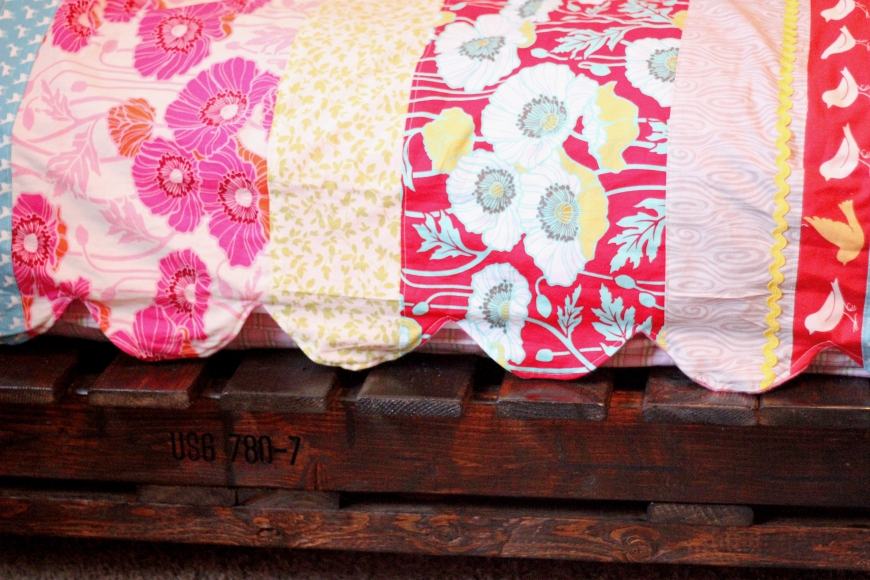
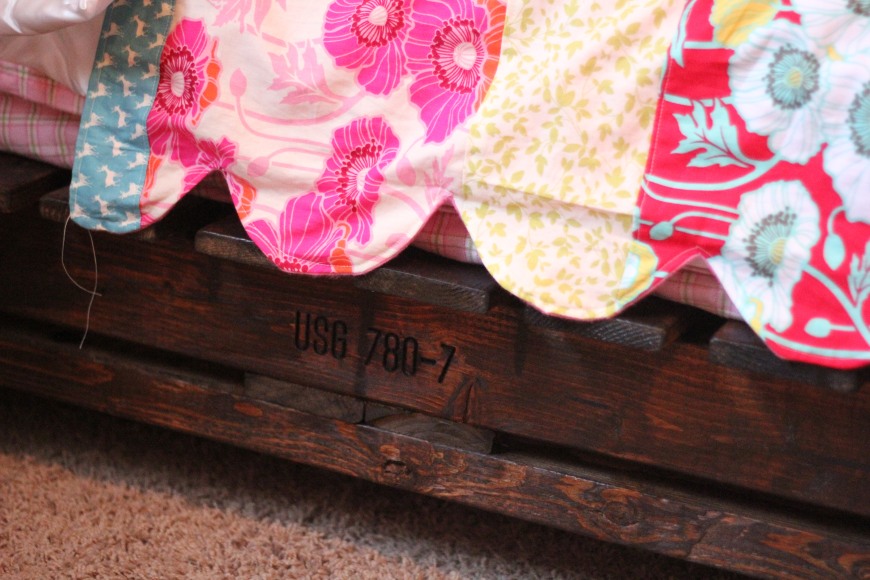
I thought about leaving the bed raw but I thought it would be fun to use some stain we already had...I'm kind of in love with the way it brought out the wood grain along with the labels on the pallet.
2012-12-10 11.25.24
I ended up putting two coats of stain on because the first coat was a little uneven in spots ...I'm a novice wood stainer ;) But the finished look still has plenty of the wood grain showing through.
2012-12-10 11.25.44
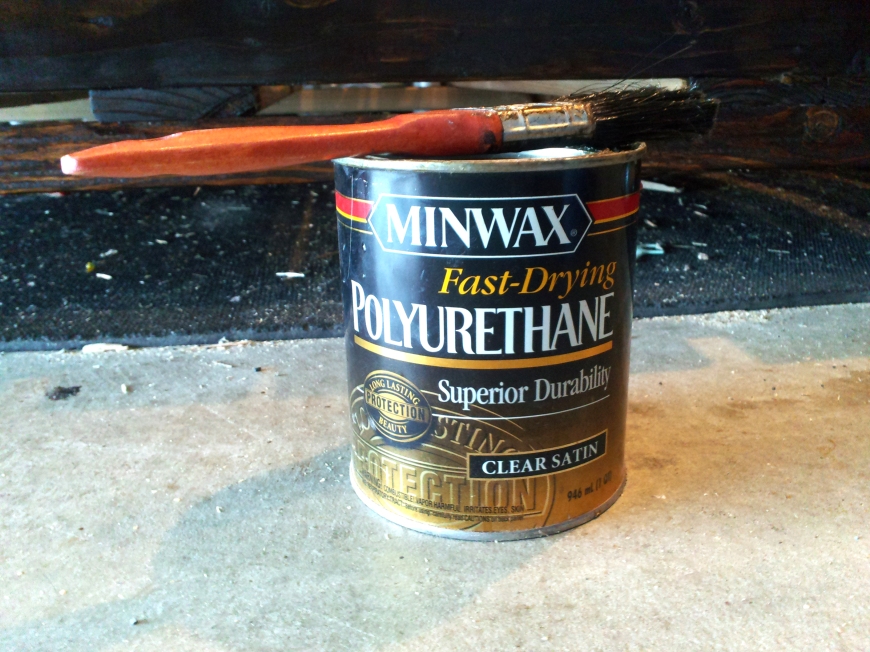
We let the stain dry for a day or so - I think you're supposed to let it dry for 24 hours but we've got a lot going on so it was a few days before we added the polyurethane coat on. I wanted to seal the stain but not have the bed be super shiny so we used a satin finish and I just brushed on a very thin coat.
2012-12-12 12.46.44
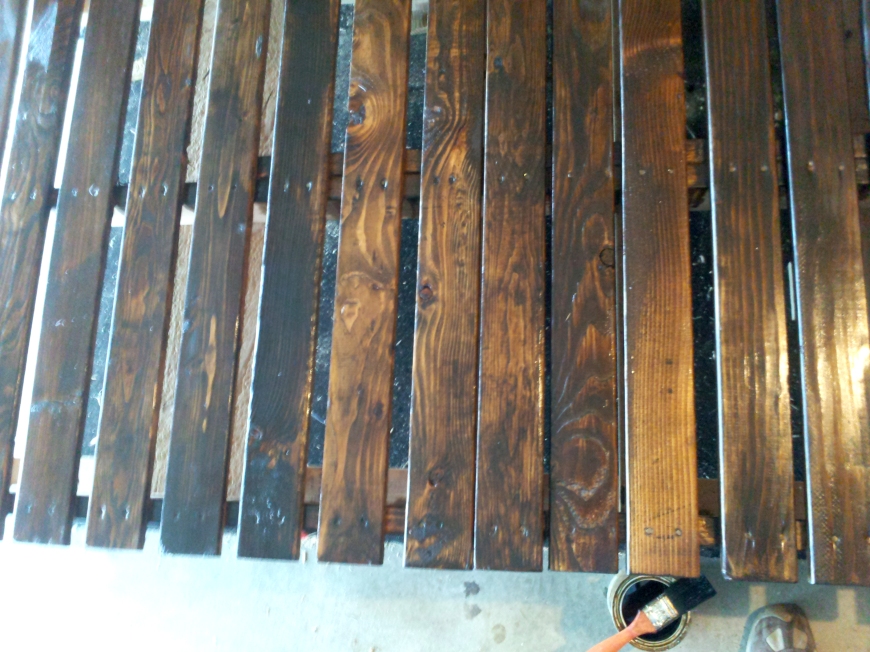
Below is when the Polyurethane is still drying - it didn't end up quite as shiny as this but it brought out the wood grain even more and just made it look rich.
2012-12-12 12.47.23
I love the final product. It adds a little roughness and country to her girlie girl room and that's perfect for who she is. She's a spunky kid. *Please* ignore my threads that need to be cut - details like those often go unnoticed when you've got holiday preparations in full swing along with 3 small kids bopping around.
IMG_6232
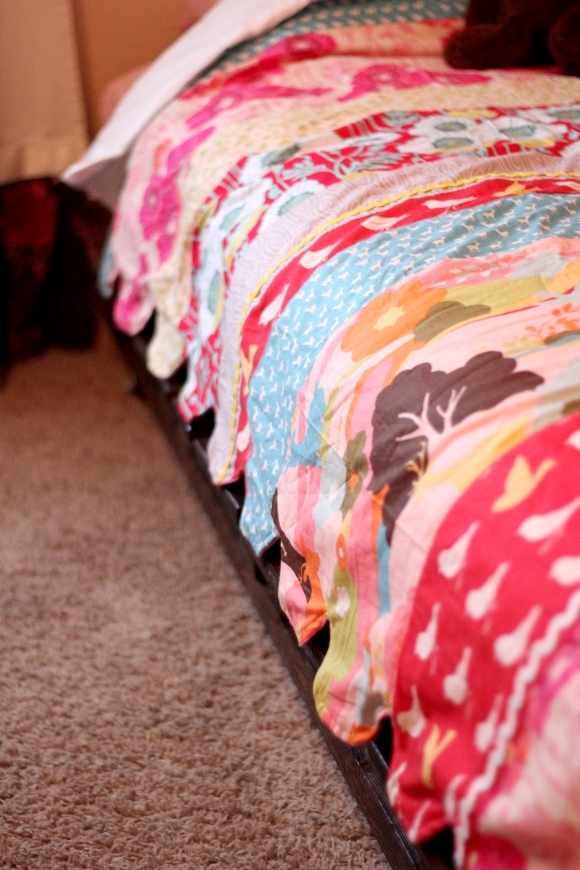
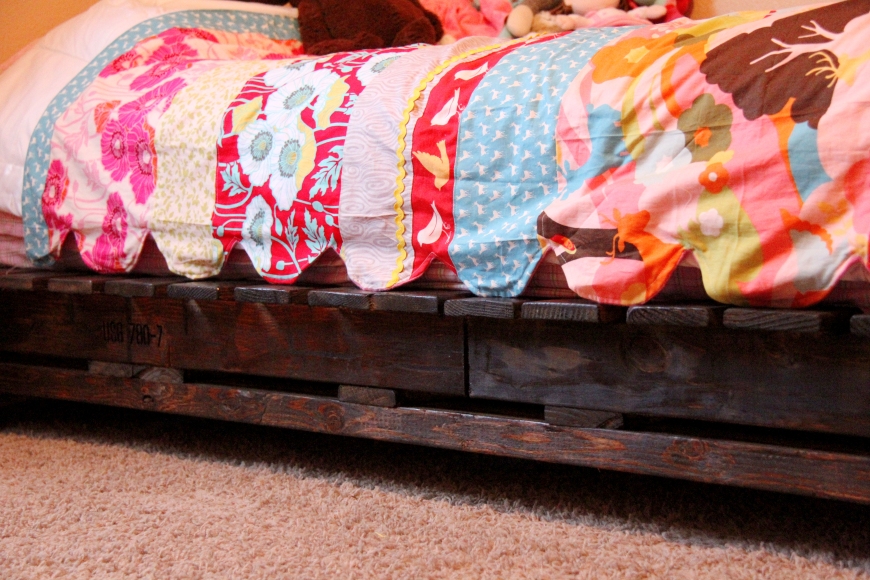
To finish the big girl bed, I made her a quilt based on one I've seen around Pinterest but I wasn't able to find again. It was VERY easy because it doesn't require a pattern, just horizontal strips of fabric. I added some scrap flowers to a seam I didn't like looking at on one of the bigger prints. And the word "love" with some spare ric rac I had in my scraps box. Have you seen the Oh Deer! fabric line from Moda? I LOVE it. Love love it. I got all of my fabric (there's some gorgeous prints from Joel Dewberry's Notting Hill collection in there too!) from FatQuarterShop.com. I love getting fabric from their site because I don't have to take the girls into a store and browse - that's STRESSFUL! :) Plus Fat Quarter Shop has SUCH an amazing selection.
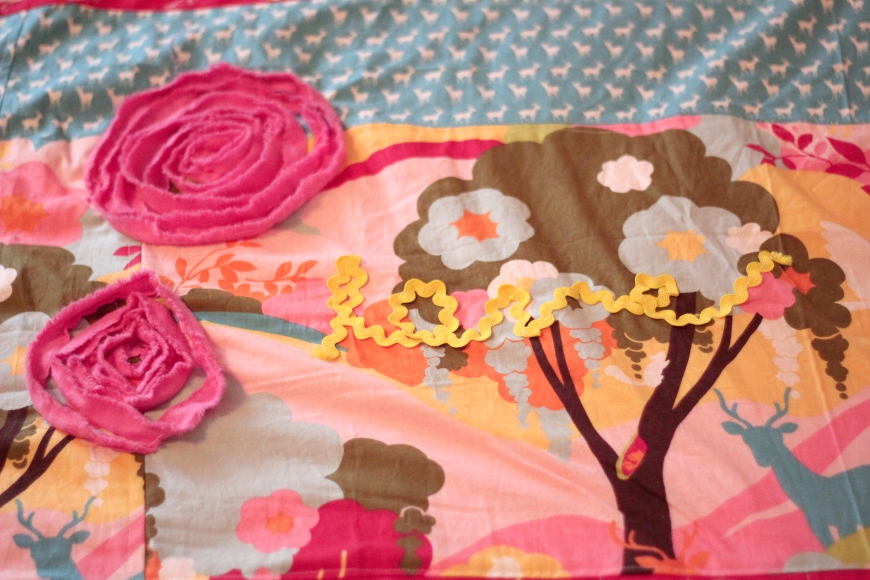
IMG_6249
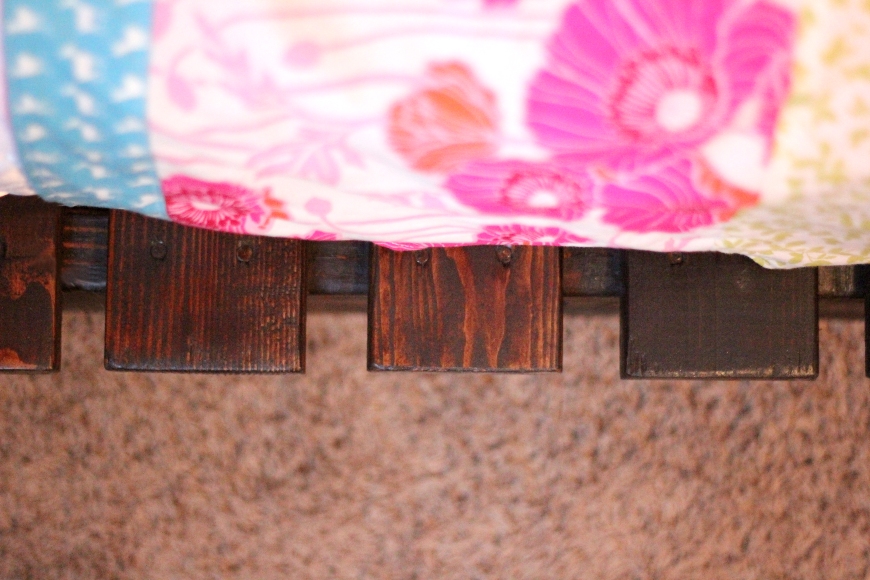
I scalloped the edges of the quilt because I knew we would only have a mattress on the bed (without a box spring) and I thought it would be cute. Those scallops were kind of a pain...I'm sure there's a better, more "correct" way to sew them, but I had one day to get the thing finished in between all our Christmas prep so I did what worked...I probably wouldn't do it again, except it IS pretty cute. And I love details that make my things a little unusual and unique.
IMG_6252
IMG_6273
The two pallets together ended up being about 8 inches longer than a standard twin mattress. We like that extra wood at the end because she can use it as a little step up to her bed...if you were making your own pallet bed, you could always saw off that extra space or buy an extra long twin mattress if it bugged you :)
IMG_6281
IMG_6290
IMG_6292
I love the way this turned out! I also love that we tackled making our own furniture together. It was a fun adventure that didn't cost a ton of money... the bed itself only cost us $46 (the total cost of the pallets and the wheels) because we used stain and polyurethane we already had in our garage. It always pays to look around the garage and house before you start a project to see what you already have. I am constantly using scraps from my fabric stash or paint we already have purchased for other projects and it helps keep our costs low.
I hope you try this project for yourself! These would be great guest beds or could be altered a bit for outdoor furniture too! If we can do it - you can too!
IMG_6304
Thanks for reading! I hope you give this a try if it looks like fun! Thank you so much, Casey, for having us! Em

Wednesday, January 16, 2013

animal.

Hi! I'm Isobel, first time mama to little wild child named Holden and digital editor of Babiekins Magazine. I'm also the voice behindholdenonbaby, a lifestyle and style blog that follows my life with Holden and our style choices along the way.
I've been obsessing over these animal heads from Anthropologie for some time now and I finally decided to attempt to make one myself. What you need:
  • Kraft paper
  • Masking tape
  • White paper
  • Flour & Water
  • Acrylic paint
What you do:
  1. Create little balls out of the kraft paper and masking tape to form a shape that looks similar to the animal you are creating. I used a plastic animal mask that I bought at a party supply store for $3.99 as a guide when creating the zebra form.
  2. Boil 1 part flour/ 3 parts water and mix thoroughly.
  3. Let the mixture cool. Dip scraps of white paper (I used computer paper) into the water/flour mixture and begin covering the kraft paper form, creating shape where you need it. Use paper towels or toilet paper to create the little details like the eyes, nose, and ears.
  4. Let it dry overnight.
  5. Paint the animal.
  6. Hang and admire the newest addition to your room.
It's not perfect, but for a first attempt I think it will pass.

Monday, January 14, 2013

hip handmade heart streamers.

Header
TWOUP

Hi ya, I'm Kelly. Mom to buddy roo + two, designer, project manager & blogger at Westover Manor. Where I share my style, show off my little ones and talk a bit about life and design.

I almost never decorate for holidays. Christmas is my one exception. It's the only one I feel that needs the extra stuff to really make it feel magical. But this year I'm trying make bigger deals of holidays so the kiddos know they are special, and different than other days and times in the year.

Plus, these make the house feel all nice and cozy and cutesy and we could use a little cozy and cutesy around here. It is a lovely little holiday that silly St. Valentines day.

I used a Plain and Simple magazine for these and truth be told it felt a little sacrilegious tearing one of those little Martha beauties into little heart shaped bits. But I liked the texture of the pages the best out of all the magazines I had in the house. I've seen these made with book pages, but that would really truly feel sacrilegious.

HEART STREAMERS

Tools// 
String 
Scissors 
Magazine Pages 
Hole Punch

steps1 | westover manor

How To//
Tear out a dozen or so magazine pages. 
Fold in half, then half again. 
Trim the uneven edges and cut open the folded edge. 
Fold in half one more time. 
Trim out your heart shape.

steps2 | westover manor

Punch two holes in the center of the heart. 
'Sew' the string through the holes. 
Tie each heart off with loose knots, large enough so the holes won't slip through. 
Hang & enjoy!

VALENTINES DAY | westover manor

Wednesday, January 9, 2013

Kandinsky.

why hello. my name is Dawnelle. i am considered many things, mother and wife are at the top of the list. but you must not forget lover of sharpies, chief nose wiper, avid obsessor of texture and fabric, bohemian lover, interior designer, laundress, and the best book reader ever. i write over on Just Dawnelle about my sweet family and my life... what i think, feel, love, believe, do and obsess over. 

When I found out I was first pregnant with my little boy, I had such ideas for his nursery! I wanted it to be fun and youthful but not at all babyish. I wanted to design a nursery that would have features that could grow with him, things that he could continue to have in his room while he grew up.

That is when I found the Kandinsky prints. They were perfect! The colors were youthful and playful yet they would be something that he could grow with. The goal was to create an eclectic mix of modern lines, bold colors, and ethnic patterns and textures.


A few notes on some of the details...

His quilt and bedding were all made by me... the details of his quilt can be found here.

The rocking chair is a refinished chair originally used by my mother-in-law when she had her first child, who Christopher is named after.

His mobile is one of my very favorite things in his entire room! It consists of 32 paper origami cranes all in a different, yet coordinating, colored paper. It is absolutely fabulous!!!


 A few more details... remember this fun project with the scrapbook paper?? I love having a picture of the boy's mommy and daddy in his room for him to see...


The picture above his changing table, the one above, is a collection of Picasso's animal sketches. It is actually from Ikea, but I love having classic art in a children's room! The boy thinks it is a total blast as well to point to the different animals.

I'm so excited to have the room all put together after all this time! It has become my very favorite room in the house... I won't lie... and the boy loves it too I think!


What do you think? Was I able to accomplish my goal??